Sowing seeds is one of the most essential steps in gardening, but it can also be one of the most challenging. Tiny seeds slip through fingers, spacing becomes inconsistent, and planting sometimes becomes messy—especially for beginners. What if you could make the process cleaner, faster, and more efficient using simple improvised tools made from materials you already have at home?
Improvised seed-sowing tools are practical, inexpensive, and surprisingly effective. Whether you’re growing vegetables, herbs, flowers, or microgreens, a DIY sowing tool can make all the difference. This 1200-word guide will teach you how to create several types of easy, eco-friendly, and highly efficient seed-sowing tools that will elevate your gardening experience.
Let’s explore how everyday items like plastic spoons, leftover bottles, straws, and even paper can be transformed into smart gardening tools.
Why Use an Improvised Tool for Sowing Seeds?

Gardening is not just about planting—it’s about planting correctly. An improvised tool helps you:
✔ Achieve Better Seed Spacing
Uniform spacing prevents overcrowding and ensures healthier germination.
✔ Reduce Seed Waste
You avoid dropping too many seeds, especially tiny varieties like basil, mint, or lettuce.
✔ Increase Germination Success
Evenly spaced seeds receive equal nutrients, light, and airflow.
✔ Ease the Planting Process
Tools allow you to sow seeds cleanly without bending too much or using your fingers.
✔ Customize Your Gardening Style
Different plants need different sowing methods—your DIY tool adapts to your needs.
Most importantly, you can make these tools with materials lying around your house—saving money while helping the environment.
Types of Improvised Tools You Can Create

You can make multiple seed-sowing tools depending on what type of seeds you’re planting and the level of precision you want. Below are the most effective types of DIY tools.
1. The Bottle Seed Dispenser
Perfect for tiny seeds like lettuce, basil, oregano, or mustard.
Materials Needed
- A small plastic bottle (cold drink, water, or sauce bottle)
- A pushpin or heated needle
- Tape (optional)
How to Make It
- Clean the bottle thoroughly.
- Use the needle or pin to poke 3–5 small holes in the cap.
- Optionally, cover the cap with tape and poke holes through it for controlled flow.
- Fill the bottle with seeds and shake gently during sowing.
Why It Works
The holes allow seeds to flow slowly, making it easy to sprinkle them evenly. This is great for surface-sowing seeds indoors.
2. The Spoon Seeder (Ultra-Simple Method)
Ideal for medium-sized seeds like cucumber, beans, okra, and pumpkins.
Materials Needed
- A plastic spoon
- A lighter or hot water (optional for shaping)
How to Make It
- Heat the bowl of the spoon slightly (optional).
- Bend it slightly to form a small chute.
- Scoop seeds and tip them gently into the soil.
Why It Works
This gives you grip, accuracy, and prevents you from dropping multiple seeds at a time.
3. Straw Precision Seeder
Best for small seeds such as tomato, pepper, eggplant, or flower seeds.
Materials Needed
- A drinking straw
- Sticky tape
- A toothpick
How to Use It
- Place the seeds in a small bowl.
- Pick up seeds one by one by touching the slightly moist end of the straw.
- Release the seed by tapping with a toothpick.
Why Gardeners Love It
It provides true precision—great for seed trays or for placing seeds exactly where you want them.
4. Paper Seed Funnel
Perfect for gardeners who want a clean, controlled way to pour seeds.
Materials Needed
- Any scrap paper
- Tape
How to Make It
- Roll the paper into a funnel shape.
- Tape the side to hold the shape.
- Fill with seeds and tap lightly to drop them at desired spots.
Best For
Sowing larger seeds or mixing soil and seeds for broadcasting.
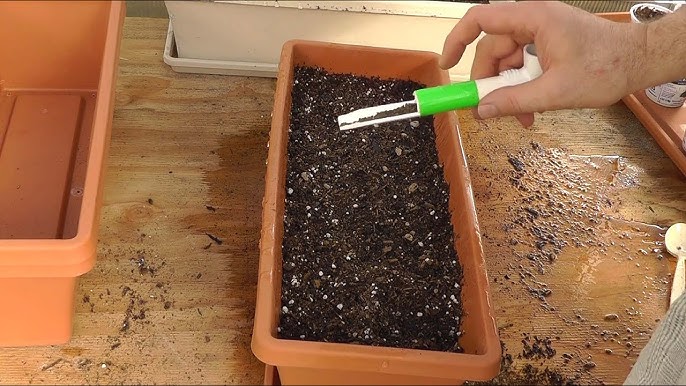
5. Recycled Pen Seeder
An ingenious solution for tiny seeds.
Materials Needed
- An empty ballpoint pen (remove ink tube)
- A needle or pin
How to Build
- Remove ink chamber from pen.
- Use the pen tube as a seed picker.
- Tap seeds out gently through the pen tip.
Benefits
You can sow seeds directly into seedling trays with zero mess.
6. Multi-Hole Dibber Board (For Serious Gardeners)
Great for sowing rows of seedlings like onions, garlic, carrots, or spinach.
Materials Needed
- A flat wooden board
- Nails or wooden dowels
- Hammer
How to Make It
- Mark evenly spaced points on the board.
- Attach nails (or dowels) on each marked spot.
- Press the board onto the soil to create holes at once.
Why Gardeners Use It
It ensures perfect spacing, making your garden look tidy and organized.
7. Bottle Cap Seed Dropper
Perfect for sprinkling seeds at a slow, controlled rate.
Materials Needed
- Plastic bottle cap
- Heated nail
- A small bottle
How to Prepare
- Heat a nail and make a single small hole in the center of the cap.
- Fill bottle with seeds and screw on the cap.
- Shake gently while sowing.
Great For
Herb seeds, leafy greens, and flowers.
How to Use Your Improvised Seed Tool Correctly
Even the best tool works only when you use the right sowing technique.
1. Prepare the Soil
- Loose
- Fine texture
- No lumps
- Rich in compost
A well-prepared surface helps small seeds germinate better.
2. Sow at the Right Depth
General rule of thumb:
- Tiny seeds: Do NOT bury—just press lightly
- Medium seeds: ½ inch deep
- Large seeds: 1–2 inches deep
3. Maintain Proper Spacing
Your tool helps, but be mindful:
- Herbs: 1–2 cm
- Leafy greens: 10–15 cm
- Large vegetables: 30–45 cm
4. Water Gently
Use a mist spray to avoid displacing seeds.
Benefits of DIY Seed-Sowing Tools
🌿 Affordable and Eco-Friendly
You recycle household items and avoid buying expensive gadgets.
🌿 Perfect for All Gardeners
Beginners love the simplicity, experts love the precision.
🌿 Improves Seed Germination Rates
Better placement = stronger seedlings.
🌿 Customizable
Modify hole size, length, shape, and flow according to your plant variety.
🌿 Great for Kids and Family Gardening Activities
Making the tools is fun and educational.
Tips for Perfect Seed Sowing
Here are a few bonus tips professional gardeners swear by:
✔ Moisten the soil before sowing
Dry soil might push seeds away or cause uneven settling.
✔ Mix tiny seeds with sand
This ensures even spreading.
✔ Label your seed trays
Avoid confusion later.
✔ Don’t over-seed
Overcrowding leads to weak plants.
✔ Keep seeds stored dry and cool
Fresh seeds = better germination.
Common Mistakes to Avoid
❌ Sowing seeds too deep
Most seeds only need light covering.
❌ Overwatering
Can displace seeds or cause rot.
❌ Using large holes in your tool
Seeds may fall out too quickly.
❌ Not sterilizing your tools
Clean tools prevent fungal spread.
❌ Ignoring spacing
Leads to thinning later.
Avoid these and you’ll enjoy a smooth sowing experience every time.
Conclusion
Improvised seed-sowing tools are proof that gardening doesn’t need to be expensive or complicated. With creativity and simple household materials, you can build tools that improve accuracy, boost germination rates, and make sowing seeds incredibly enjoyable. From bottle dispensers and straw seeders to paper funnels and dibber boards, each method offers a unique advantage.
These DIY tools not only simplify your gardening routine but also help you grow stronger, healthier, and more uniform seedlings—setting the perfect foundation for a thriving garden.