Composting is one of the most powerful, cost-effective, and eco-friendly practices any gardener can adopt. Instead of throwing away kitchen scraps, leaves, and garden waste, you can transform them into nutrient-rich compost—often called black gold for its ability to boost plant growth, improve soil structure, and increase moisture retention. And the best part? You can create a compost bin right at home, even with simple materials.
In this 1200-word guide, you’ll learn how to build your own compost bin, what materials you can use, how to fill it correctly, and tips to create perfect compost every time.
🌱 Why Create Your Own Compost Bin?
Before diving into the steps, let’s understand the benefits of having your own compost bin.
✔ Saves Money
No need to buy fertilizers—your kitchen waste becomes plant food.
✔ Reduces Household Waste
Up to 40% of home waste is compostable.
✔ Improves Soil Health
Compost adds organic matter, beneficial microbes, and essential nutrients.
✔ Environmentally Friendly
Keeps organic waste out of landfills, reducing methane emissions.
✔ Easy to Create
You can build a working compost bin from materials you already have.
A compost bin enhances your garden and helps the planet—a win-win.
🪴 Types of Compost Bins You Can Build
Before choosing materials, decide what kind of bin suits your space and needs.
🌿 1. Wooden Pallet Compost Bin
Excellent for gardens, affordable, and breathable.
🌿 2. Plastic Barrel Compost Bin
Great for small spaces and can be used as a tumbler.
🌿 3. Brick or Block Bin
Long-lasting and sturdy.
🌿 4. Wire Mesh Compost Bin
Simple, inexpensive, and allows maximum airflow.
🌿 5. Plastic Tote Box Bin
Perfect for balconies or patios.
Choose one based on available materials and garden size.
🛠️ Materials You Can Use to Build a Compost Bin

Your bin can be made from almost anything sturdy:
✔ Wooden pallets
✔ Plastic barrels
✔ Wire mesh
✔ Concrete blocks
✔ Large plastic containers
✔ Old buckets or storage bins
✔ Metal sheets
✔ Bamboo or wooden planks
As long as air can circulate, the bin will work.
🌱 How to Create Your Compost Bin: Step-by-Step Guide
Below is a simple method suitable for most gardens.
🧱 Step 1: Choose the Right Location
Place your compost bin where:
- It receives partial sunlight (for warmth)
- The ground is level
- It’s easily accessible
- Water can drain naturally
- You can add and remove material comfortably
Avoid placing it too close to your home’s wall or in heavy shade.
🪵 Step 2: Build the Structure

Here’s an easy DIY version using wooden pallets, but you can adapt steps to other materials.
You’ll Need:
- 3–4 wooden pallets
- Nails or strong rope
- Hammer
- Wire mesh (optional for airflow)
Assembly:
- Stand three pallets upright to form a U-shape.
- Secure them using rope or nails.
- Add the fourth pallet as a door or leave the front open for easy access.
- If desired, line sides with mesh to keep materials contained.
That’s it—your compost bin frame is ready.
🍂 Step 3: Add the Base Layer
Never place compost on concrete—microbes thrive when in contact with soil.
Create a base using:
- Twigs
- Small branches
- Straw
This promotes drainage and airflow from below.
🌿 Step 4: Understand the Composting Formula
Successful composting requires balancing two main components:
🟫 1. Browns (Carbon-rich materials)
These help with structure and prevent bad odor.
Examples:
- Dry leaves
- Wood chips
- Paper
- Cardboard
- Straw
- Sawdust
🟩 2. Greens (Nitrogen-rich materials)
These provide moisture and feed microbes.
Examples:
- Vegetable peels
- Fruit scraps
- Coffee grounds
- Tea leaves
- Fresh grass clippings
- Garden trimmings
Ideal Ratio: 3 Browns : 1 Green
This keeps your compost productive and odor-free.
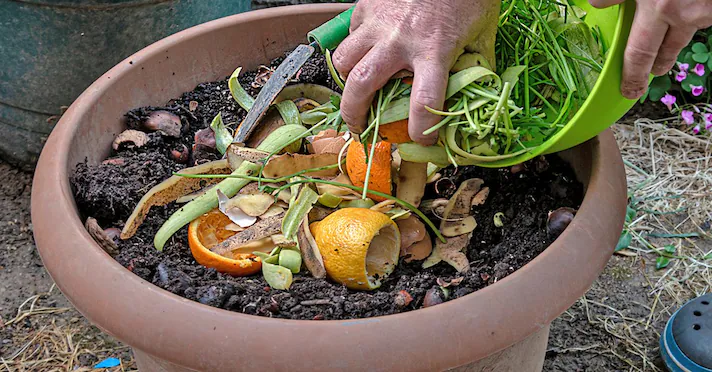
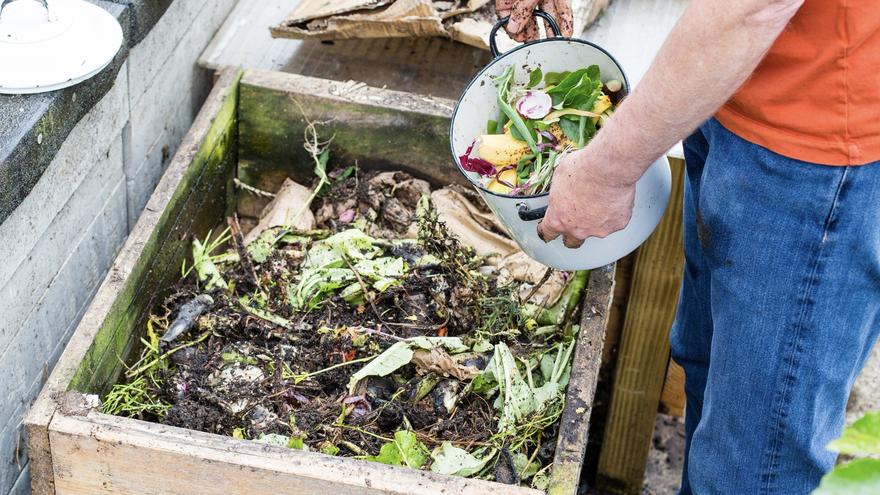
🍃 Step 5: Start Filling Your Compost Bin
Layer your materials like a sandwich:
- Place a layer of browns
- Add greens
- Add browns again
Sprinkle some garden soil or finished compost to introduce microbes.
Moisten the pile lightly—it should feel like a squeezed sponge.
Continue layering as you produce more kitchen and garden waste.
🔄 Step 6: Turn the Compost Regularly
Turning introduces oxygen, which speeds up decomposition.
Turn your compost:
- Every 7–10 days
- Or whenever it feels compacted
A garden fork or shovel works perfectly.
If you built a tumbler bin, just rotate it regularly.
💧 Step 7: Monitor Moisture
Your compost should never be too dry or too wet.
If the pile is dry:
Add green materials or sprinkle some water.
If the pile is too wet:
Add dry leaves, cardboard, or sawdust.
Proper moisture ensures efficient breakdown.
⏳ Step 8: Wait for Your Compost to Mature
Depending on temperature and turning frequency, compost takes:
- 6 to 12 weeks in a warm climate
- 3 to 6 months in cooler temperatures
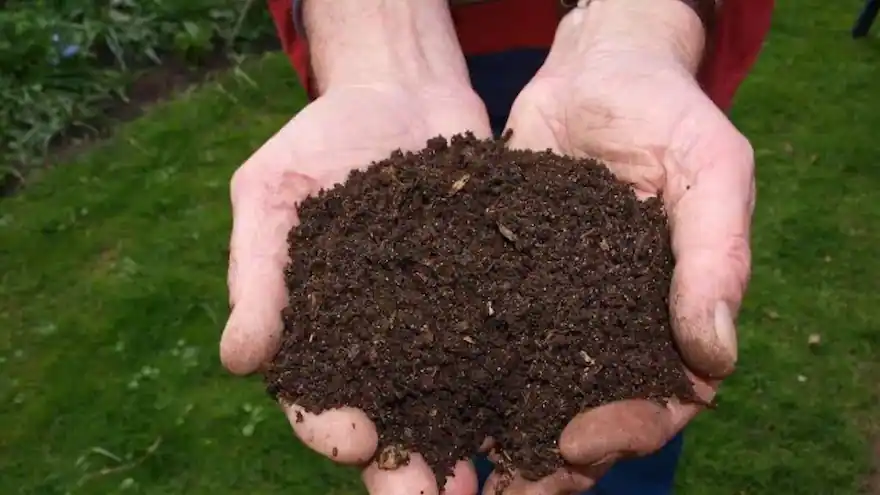
Your compost is ready when:
- It’s dark brown
- Crumbly
- Smells earthy
- No recognizable scraps remain
🌾 How to Use Your Finished Compost
Once ready, compost becomes a powerful soil enhancer.
You can use it for:
✔ Vegetable gardens
✔ Flower beds
✔ Potted plants
✔ Seed starting
✔ Mulching around trees
✔ Improving sandy or clay soils
Mix it into topsoil or spread it around crops as a nutrient boost.
🌱 Common Composting Mistakes & How to Avoid Them
Even beginners can succeed by avoiding these mistakes:
❌ Bad Odor
Caused by too many greens.
Fix: Add more browns and turn the pile.
❌ Pile Not Decomposing
Usually too dry or lacking nitrogen.
Fix: Add water or fresh green material.
❌ Pests in the Bin
Occurs when food scraps are exposed.
Fix: Bury scraps under brown layers.
❌ Slimy or Wet Compost
Caused by poor drainage.
Fix: Add dry carbon materials and aerate.
🪴 Pro Composting Tips for Faster Results
✔ Chop large scraps into smaller pieces
✔ Maintain good airflow with a wire mesh
✔ Add manure or compost starter for acceleration
✔ Keep a bucket of browns nearby for quick layering
✔ Cover the pile during rainy season
Following these boosts the speed and quality of your compost.
🌿✨ Final Thoughts: Build Your Bin, Feed Your Garden Naturally
Creating your own compost bin is simple, inexpensive, and incredibly rewarding. With the right structure, proper ingredients, and a little maintenance, you can produce rich, organic compost that transforms your soil and helps your plants thrive.
Whether you’re gardening on a balcony, small backyard, or large homestead, a compost bin is the cornerstone of a healthy, sustainable garden.