Celery is one of those wonderful vegetables that many gardeners want to grow, but often avoid because it has a reputation for being tricky. It needs consistent moisture, rich soil, and careful maintenance—conditions that can be difficult to maintain in traditional pots or garden beds. But what if growing celery could be not only simple, but almost effortless?
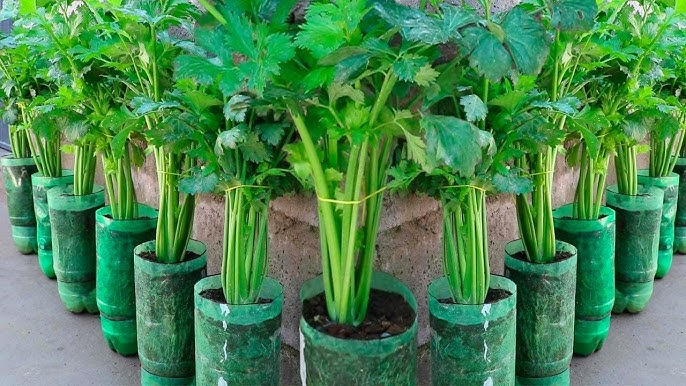
The solution is beautifully simple: self-watering bottles.
This clever gardening method allows you to repurpose plastic bottles and create a mini water reservoir system that keeps your celery perfectly hydrated 24/7. No more worrying about overwatering or underwatering. No more daily attention. Just set it up and let nature—and gravity—do the work.
In this full-length guide, you’ll learn everything you need to grow healthy, crisp, long-stemmed celery right at home using self-watering bottles. Whether you live in a city apartment or a home with limited space, this method promises big harvests with little effort.
Let’s begin!
🌿 Why Grow Celery in Self-Watering Bottles?

Celery is a moisture-loving plant that requires evenly damp soil throughout its growth cycle. Too much water drowns the roots, and too little causes bitter, tough stalks. This constant balancing act is where most gardeners struggle.
Self-watering bottles perfectly solve these issues.
Here’s why this system works beautifully for celery:
1. Consistent Moisture
The reservoir at the bottom keeps the soil evenly moist—exactly what celery needs.
2. No Overwatering
Excess water stays in the bottom chamber and is absorbed gradually—zero risk of root rot.
3. Easy to Maintain
Fill the reservoir once every few days and forget about it.
4. Water-Saving
The system recycles moisture through capillary action, minimizing waste.
5. Space-Friendly
Grow celery on balconies, windowsills, patios, or even indoors.
6. Eco-Friendly
Recycling plastic bottles reduces waste and repurposes an everyday item into a garden tool.
If you’ve struggled growing celery before, self-watering bottles will make you fall in love with this crunchy, aromatic vegetable.
🧴 Step 1: Gather Your Materials
You don’t need anything fancy to get started. Here’s what to prepare:
Materials:
- A 1.5 or 2-liter plastic bottle
- A small piece of cotton rope, fabric, or shoelace (for the wick)
- A sharp blade or scissors
- Potting mix (light, rich, and well-draining)
- Celery seeds or starter stalks
- A nail or heated needle (to make holes)
- A marker
Choosing the Right Bottle:
The wider the bottle, the better the root space. Transparent bottles allow you to monitor the water level easily.
✂️ Step 2: Build Your Self-Watering Bottle System
This step is easier than it looks! Follow these simple instructions:
1. Cut the Bottle
Cut the bottle into two parts—approximately one-third from the top.
- The top section becomes the soil chamber.
- The bottom section becomes the water reservoir.
2. Insert the Wick
Take the bottle top and insert the wick through the bottle opening. About half of the rope should hang inside the reservoir, with the other half buried in soil.
3. Place the Top Inside the Bottom
Flip the top half upside down and place it inside the bottom part like a funnel-style planter.
4. Create Air Holes
Poke 2–3 small air holes around the rim of the soil chamber for better aeration.
5. Fill the Reservoir
Pour water into the bottom chamber. The wick should remain submerged.
Your self-watering planter is now ready!
🌱 Step 3: Prepare the Soil Mix

Celery thrives in nutrient-rich, moisture-retentive soil.
Best Soil Mix for Celery:
- 40% compost
- 40% coco peat or peat moss
- 20% perlite or coarse sand
This mix holds moisture without becoming sticky, allowing the wick to function perfectly.
🥬 Step 4: Planting Celery
You can grow celery in two ways:
- From seeds
- From store-bought celery base (regrowth method)
Let’s explore both.
Method 1: Growing Celery from Seeds

Celery seeds are tiny and slow to germinate, but patience pays off!
Steps:
- Moisten the soil lightly.
- Sprinkle celery seeds on top (do not cover deeply—light germination).
- Mist gently with water.
- Cover with a plastic wrap or clear lid to retain humidity.
- Place in a warm area with indirect light.
Germination time: 14–25 days.
Once seedlings have 3–4 true leaves, thin them or transplant the strongest one into your self-watering bottle.
Method 2: Regrowing Celery from Kitchen Scraps
This is the easiest and quickest method!
Steps:
- Cut the base of your celery bunch (about 2 inches).
- Place it in a shallow container with water for 3–5 days.
- Tiny leaves will sprout from the center.
- Plant this in your self-watering bottle with the top exposed.
This method gives you a head start and is perfect for beginners.
🌞 Step 5: Provide Light and Temperature
Celery grows best in cool, mild weather.
Ideal Conditions:
- Temperature: 15–24°C (60–75°F)
- Light: 6 hours of sunlight daily
If growing indoors, place near a bright window or use a grow light.
Avoid extreme heat—celery may become bitter or bolt (flower early).
💧 Step 6: Watering the Self-Watering System
This is the best part—minimal watering required!
How It Works:
- The reservoir provides steady moisture.
- The wick pulls water upward into the soil.
- The plant absorbs only what it needs.
Maintenance:
- Refill reservoir every 3–7 days depending on weather.
- Keep reservoir clean to prevent algae buildup.
- Avoid fertilizing directly into the reservoir.
🌿 Step 7: Feeding Your Celery
Celery is a heavy feeder and needs consistent nutrients.
Fertilizer Plan:
- Add compost to soil before planting.
- Every 10–15 days, use a light dose of:
- Liquid seaweed or
- Fish emulsion or
- Compost tea
Avoid strong chemical fertilizers—they may make the stalks tough.
🌼 Step 8: Mulching (Optional but Helpful)
Even in a self-watering system, mulching helps reduce surface evaporation.
Use:
- Dry leaves
- Grass clippings
- Coconut husk chips
Spread a thin layer around the base of your celery plant.
🌱 Step 9: Care and Maintenance Tips
To ensure crisp, juicy celery:
1. Keep Soil Moist (Not Waterlogged)
Check reservoir levels regularly.
2. Remove Yellow Leaves
This boosts air circulation and encourages fresh growth.
3. Support Tall Stalks
Use small stakes or string to keep celery upright.
4. Shade During Heatwaves
This prevents bitterness and bolting.
5. Rotate Plant
If indoors, rotate your bottle slightly every few days for even light.
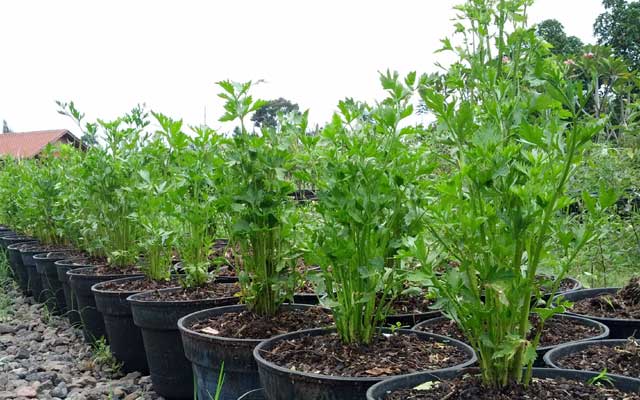
🥗 Step 10: Harvesting Your Celery
Celery takes time to mature—usually 3 to 4 months.
How to Harvest:
- Cut stalks individually from the outer layer.
OR - Harvest the entire plant at soil level.
After harvesting, regrowth is possible if the center remains intact!
Flavor Tip:
Water-rich celery grown in self-watering systems tends to be sweeter, crisper, and more aromatic—perfect for salads, soups, and fresh snacks.
🌟 Final Thoughts
Growing celery in self-watering bottles is one of the smartest home gardening hacks you can try. It makes an otherwise demanding plant incredibly easy to manage while giving you a continuous supply of fresh, homegrown stalks.